USB-C cables are a controversial topics, and rightfully so. USB C has standardized the connector type, but brought us the Wild West of Wiring. Different USB-C cables they all might look exactly the same, but you’ve likely experienced that they’re not the same internally, and often there’s not a label in sight. Yes, it’s pretty bad, and one could argue it’s getting worse. And we are only talking about USB C male – USB C male cables here.
Purely following the specification, there used to be six types of USB-C to USB-C cables out there. Then, it became eight. The amount of possible USB C cable combinations almost is endless. If you use the wrong cable, data transmission may be slower than possible or certain devices may not work at all. A USB-C cable is supposed to contain either no high-speed pairs, or four of them, in addition to the required USB 2.0 pair. There are also legal exceptions to this rule.
Of course, the manufacturer knows the cable capabilities and exact internal structure when they build it, but usually they not mark it clearly to their products. Sometimes there are labels on the packaging, sometimes not clear markings. You might want to label your cables before you throw out the package to know which is which. Unfortunately there is no easy way to extract whether a certain cable can support a certain use case if it is no marked to the cable.
What do you do when you want to know what this unmarked USB C cable really is? So what are the tools for checking the USB C cables yourselves to know what type they are and if they are damaged? Do you want to check for yourself? No need to cut the cable apart, thankfully.
You can check the cable capabilities by reading the emarker. If an emarker is not present, you can assume USB 2.0 speeds and 3 A current support, but not necessarily much more than that. Apart from current carrying capability of the cable, the emarker can tell you whether the cable contains high-speed pairs, and what kind. Emarkers are basically memory chips that can talk USB PD protocol. They’re used in cables that are slightly fancier than normal, i.e. cables with high-speed capabilities like USB3 and Thunderbolt, as well as 5 A cables. Sometimes a cable will contain two emarkers, sometimes it will contain one – it’s a manufacturing choice. For reading emarker chip data you need some special hardware device.
What if you want to verify the connectivity of different wires on the USB cable? Measuring the different wires with a multi-meter is not fun because USB C connectors are very small, hard to read to pins and has many contacts. A USB C break-out board connected to both ends can make it a little bit easier.
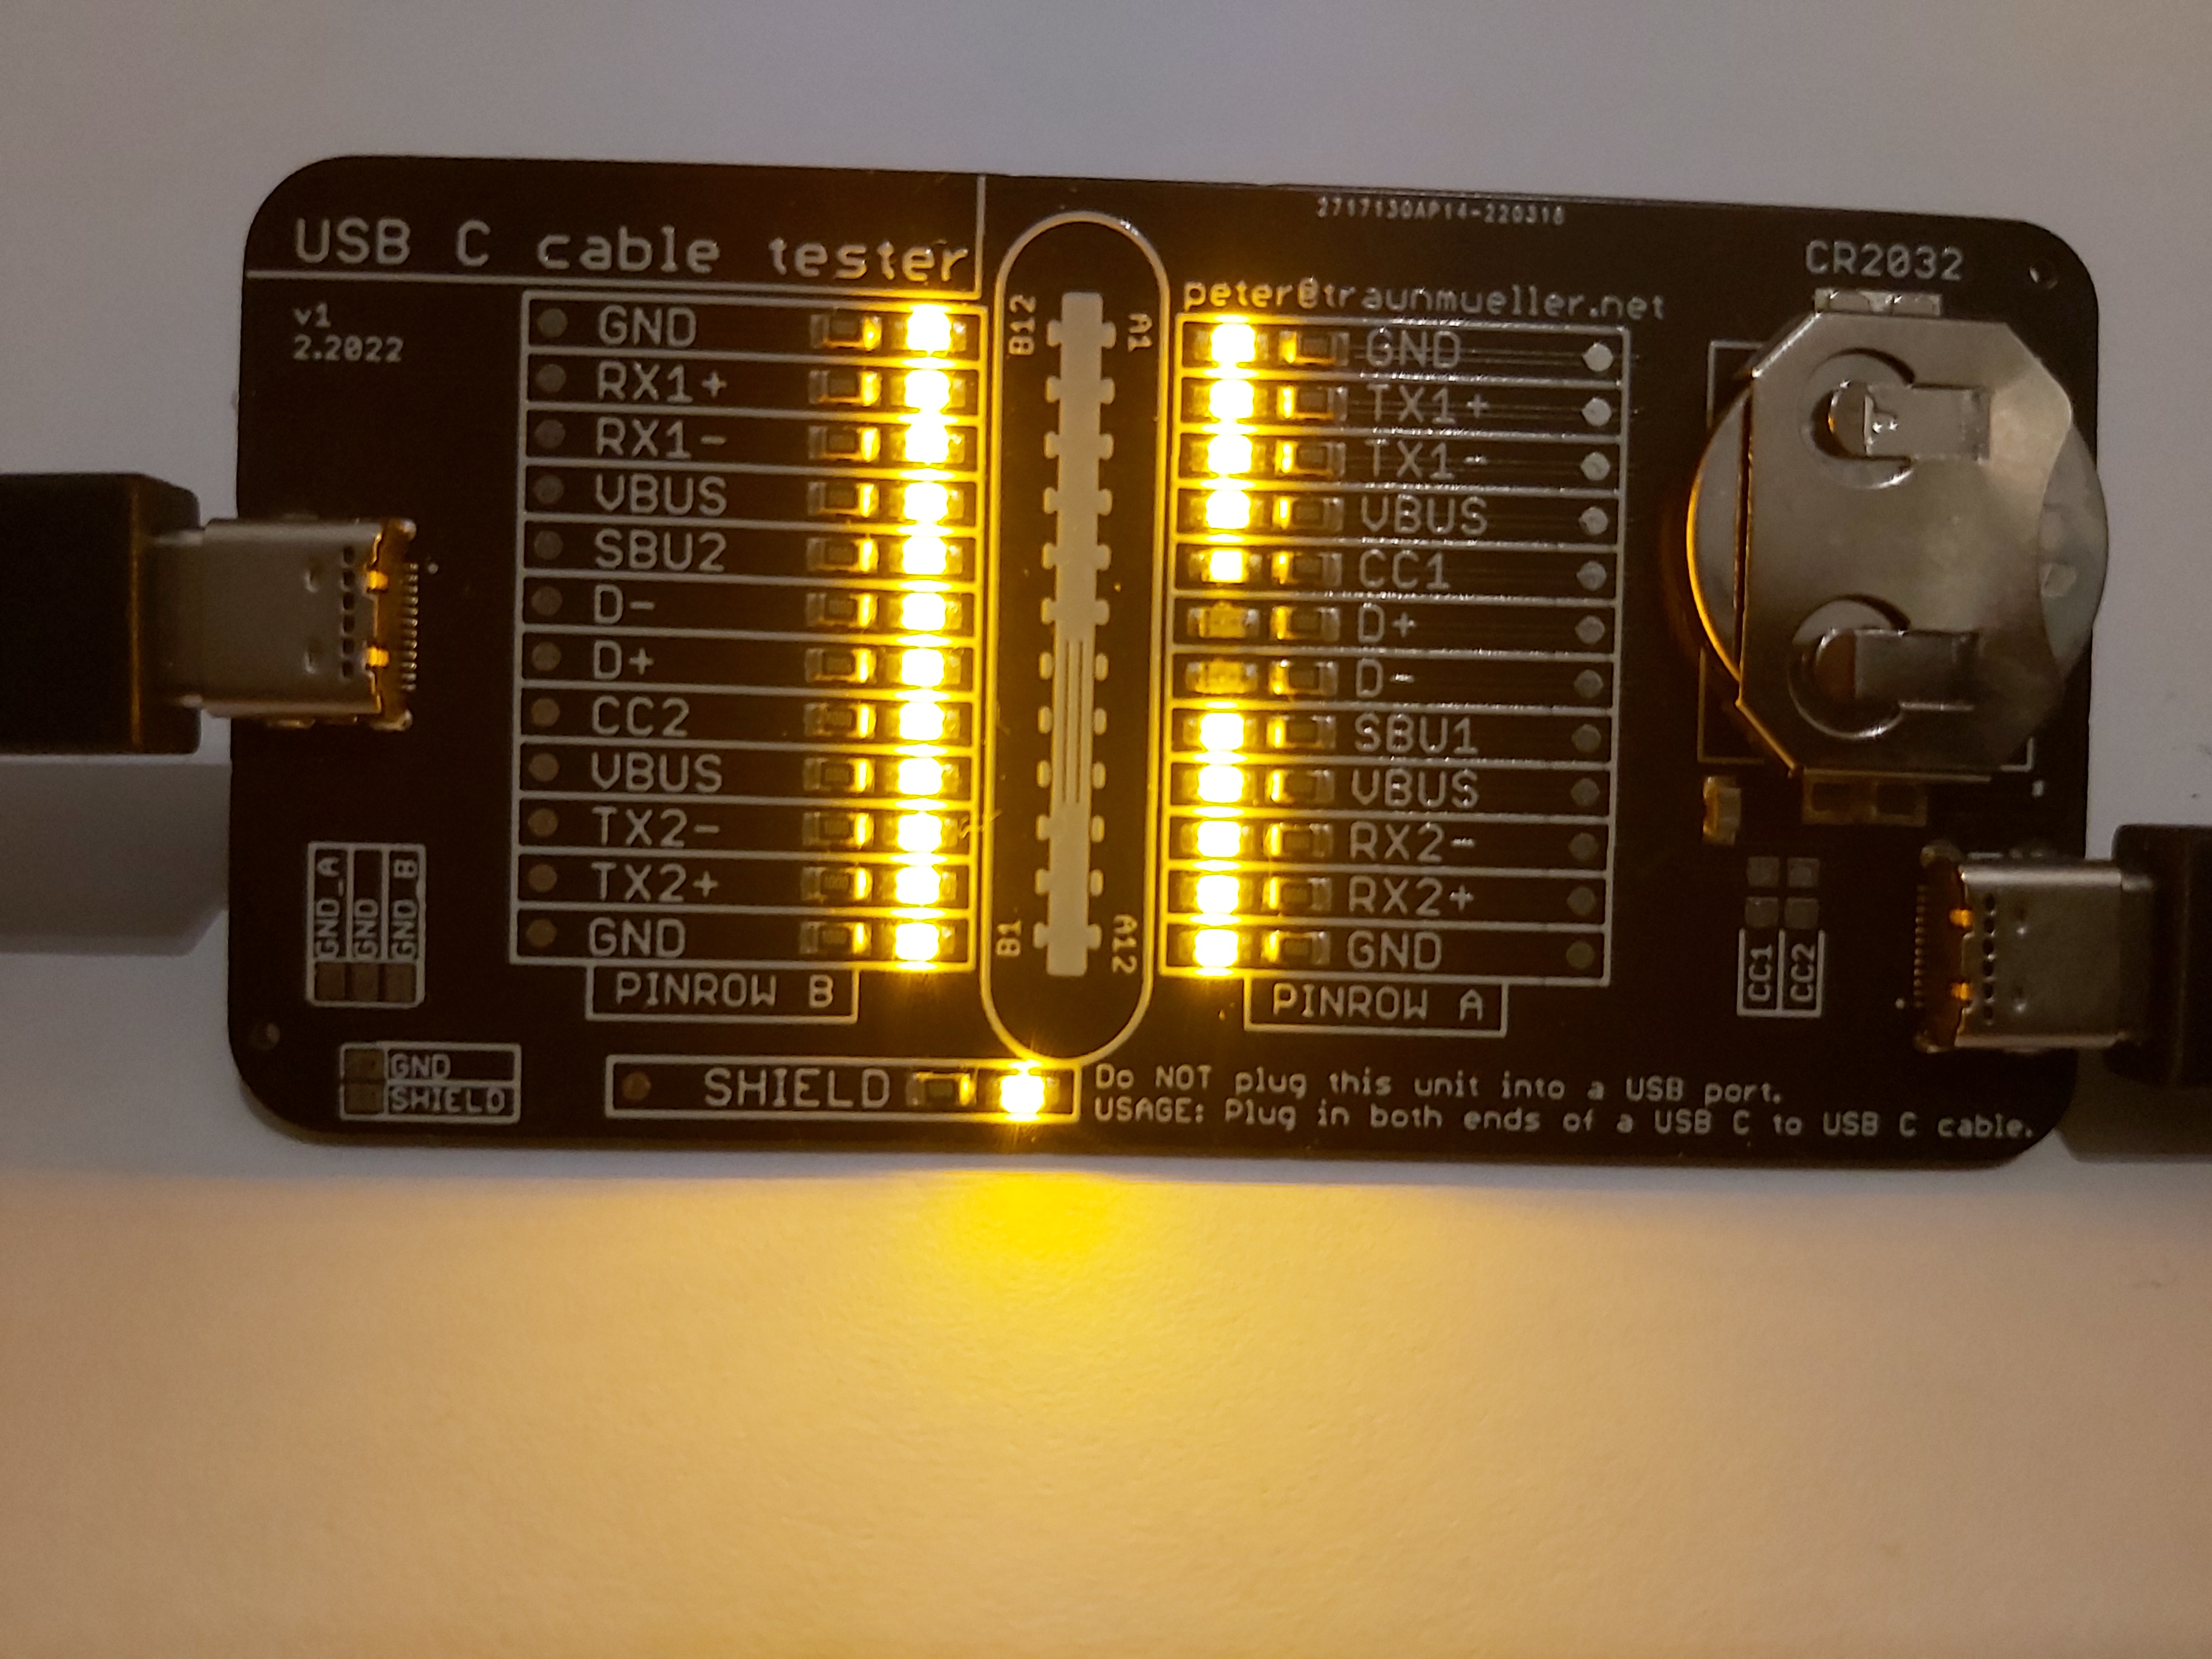
For testing USB C cables I bought C2C caberQU v1 (€19.00) USB C Cable Tester v1. The C2C caberQU v1 board applies a voltage to all pins of a cable and measures which ones are connected to the other end. It features LEDs for each of the 24 pins and even shield. So in total 25 LEDs offer all possible combinations for USB-C receptacle pin usage in different modes. This is quite nice tool for quick check of the cable details and that all needed wired are still properly working. If a cable has a broken pin, that makes it even worse, due to their unpredictable behavior. The C2C caberQU cable tester solves this once and for all.
By flipping the USB connectors, the opposing LEDs for some pins light up due to them not being mirrored. That’s on purpose and defined in the USB C standard. If the cable does not have the fast data pairs, less LEDs are on.
All necessary power to operate the device is supplied via the CR2032 battery. The battery is only discharged when a cable is connected, so it should last for a while in normal use.
The product is sold with one CR2032, the PCB and some basic instructions. There is an extensive manual explaining the USB C connector and a couple of possible and valid pin combinations. The product is a bare circuit board that has no case. I store my board in small plastic bag.
The documentation says: The item still is a prototype. It is working as intended, but funny quirks and other things are possible. It is not certified, comes as a kit and only suited for prototyping.
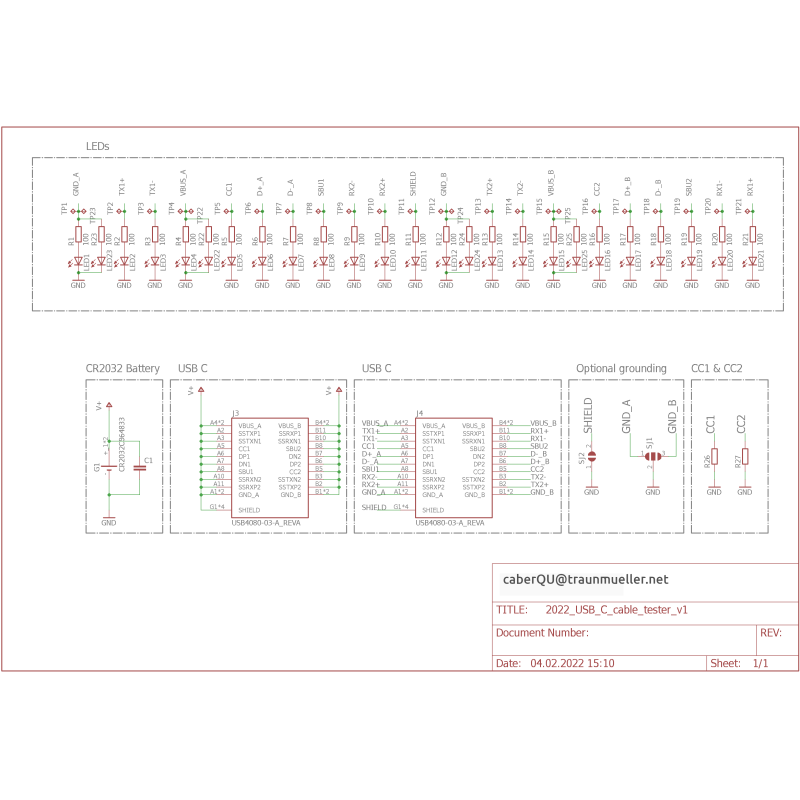
The board started as a Kickstarter project. There is circuit documentation ar GitHub at https://github.com/petl/USB-C-cable-tester-C2C-caberQU. Here is circuit diagram and product usage picture from C2C caberQU v1 product page.
Sources and links to more information:
https://blog.arduino.cc/2021/07/09/test-and-diagnose-your-usb-cables-with-this-arduino-device/
https://www.totalphase.com/blog/2020/10/what-is-e-marker-how-does-it-work/
https://www.epanorama.net/newepa/2019/03/06/usb-cable-tester/
https://hackaday.com/2022/11/20/a-handy-oshw-usb-cable-tester-for-your-toolkit/
https://github.com/alvarop/usb_c_cable_tester
https://hackaday.com/2021/07/18/arduino-cable-tracer-helps-diagnose-broken-usb-cables/
https://hackaday.com/2022/12/13/usb-c-cable-types/
https://hackaday.com/2022/12/27/all-about-usb-c-illegal-adapters/
https://hackaday.com/2023/01/04/all-about-usb-c-resistors-and-emarkers/
https://caberqu.com/home/25-c2c-caberqu-v1.html
https://www.kickstarter.com/projects/electr/c2c-caberqu-usb-c-cable-tester
https://caberqu.com/home/20-c2c-caberqu-746052578813.html
https://caberqu.com/


5 Comments
Tomi Engdahl says:
https://www.tindie.com/products/petl/usb-c-cable-tester-c2c-caberqu/?utm_source=hackaday&utm_medium=link&utm_campaign=fromstore
Tomi Engdahl says:
JITX Spits Out Handy USB Cable Tester
https://hackaday.com/2023/05/31/jitx-spits-out-handy-usb-cable-tester/
When USB first came on the scene, one of the benefits was that essentially any four conductors could get you to the point where you could send information at 12 Mbps. Of course everything is faster these days, and reaching today’s speeds requires a little bit more fidelity in the cables. This simple tester makes sure that your modern cables are actually up to the task.
One of the design goals of this project is to automate away the task of testing cables or finding one that works, especially before thinking a problem with a device is somewhere in software, spending hours or days debugging, before realizing that it’s actually being caused by a hardware malfunction. The small PCB has two USB-C fittings to plug in both of the ends of a cable to, and between those connectors there is a number of LEDs. Each LED is paired to one the many conductors within the USB cable, and not only does it show continuity of these conductors but it can also show a high resistance connection via a dimly-lit or off-color display from an LED.
Automating Everything in a USB Cable Tester PCB Design
https://www.jitx.com/blog/automating-everything-in-a-usb-cable-tester-pcb-design
https://github.com/JITx-Inc/jitx-cookbook
Tomi Engdahl says:
https://hackaday.com/2023/08/11/usb-c-cable-tester-is-compact-and-affordable/
Tomi Engdahl says:
https://goughlui.com/2014/10/01/usb-cable-resistance-why-your-phonetablet-might-be-charging-slow/
Tomi Engdahl says:
Another tester with similar ideaa
https://www.amazon.co.uk/Treedix-Cable-Tester-Data-Board/dp/B0C4YNMVFL?th=1&fbclid=IwAR0sb-QOWMOM_-EHFx12is7rMHxmdIL91LE74Oxx5Aw-Md3GUduPm6rvE-Y